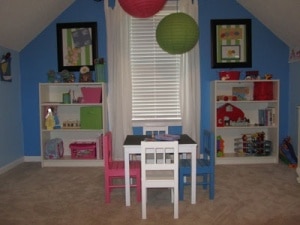
Before we organized the playroom, toys didn’t have a “place” and the room was overwhelming, honestly. But, once we came up with a plan and executed it, we have enjoyed years of good use of the space. The fun and memories made in the playroom are many, from movie nights to sleep overs to craft projects, and everything in between. If your playroom is overwhelming, it doesn’t have to be. Read on to see how we created playroom storage.
Shop for Playroom Storage
Here are the items used in this room:
Canvas buckets
Melissa and Doug wooden toys like the Melissa & Doug Wooden Take Along Tool Kit (24pc)

Chalkboard labels are key to keeping everything organized!
Galvanized buckets (with chalkboard sticker labels)
Candy jars –Ikea

Metal storage caddy and buckets

Playroom Chalkboard Wall
Chalkboard wall –Chalkboard paint can be bought from your home supply store or from Amazon and will work on multiple projects, like making a chalkboard wall, chalkboard table top, chalkboard labels, or herb pots painted with chalkboard paint for labeling. We outlined a square on the playroom wall and then painted 3 coats of chalkboard paint. After all is dry, add a border. We used contrasting leftover paint from the playroom paint project.

Corkboard to display arts and crafts
Hanging clothesline to hang artwork on the wall- Simply take fishing line and tie it between two hooks. Have your children decorate a few clothespins and then hang their artwork!
Additionally, you can display their special artwork in frames.
Advertising Disclosure: Some tips include links where Mom’s Priority receives an incentive per click or per purchase. For more information, please see our Privacy Policy and Disclosure.